
RENDERING A CHARACTER TUTORIAL
tutorial by inventize (adobical / inspiric / sourcedinfinity)
TABLE OF CONTENTS
PART 1
- Introduction & My Experience
- Materials / Software / Plugin Usage
- Blender Usage Introduction (for people completely new to blender)
- Loading and Exporting a Character
PART 2
- Blender Startup and Initialization / Importation of a Character
- Object Editing and Shaping Limbs.
- Environment Lighting / Shading and Rendering
- Exporting Image and Importing onto paint . net
- Finalization
- Final Product and Examples
PART 2 INTRODUCTION
If you haven’t read Part 1, please do read that part first, link is located here.
Part 2 will touch more on rendering within Blender and the usage of Blender overall. This tutorial will hopefully improve or increase your knowledge of using Blender for rendering and to finalize your projects in a more professional manner.
BLENDER STARTUP / INITIALIZATION AND IMPORTATION OF A CHARACTER
After opening Blender, you should be met with the splash screen as stated before in Part 1. Your screen should look like this.
https://i.imgur.com/3RR45DH.png
Once you exit out of the splash screen menu UI, you should be seeing this.
https://i.imgur.com/YNAZO2A.png
Let me mark out to you what the things in this screen are, shown below.
https://i.imgur.com/m2QEwtv.png
So, once you get onto this screen, feel free to delete the cube and the light source. You will replace this with an importation of your character.
So, how do you import it? Simple.
Go into File, located here.
https://i.imgur.com/42cXROp.png
Click on it, and then go to import. Remember that you exported that character in an .obj file? Click on import .obj, seen below.
https://i.imgur.com/Wglng8a.png
Find your file, and import it.
https://i.imgur.com/6ly0nFW.png
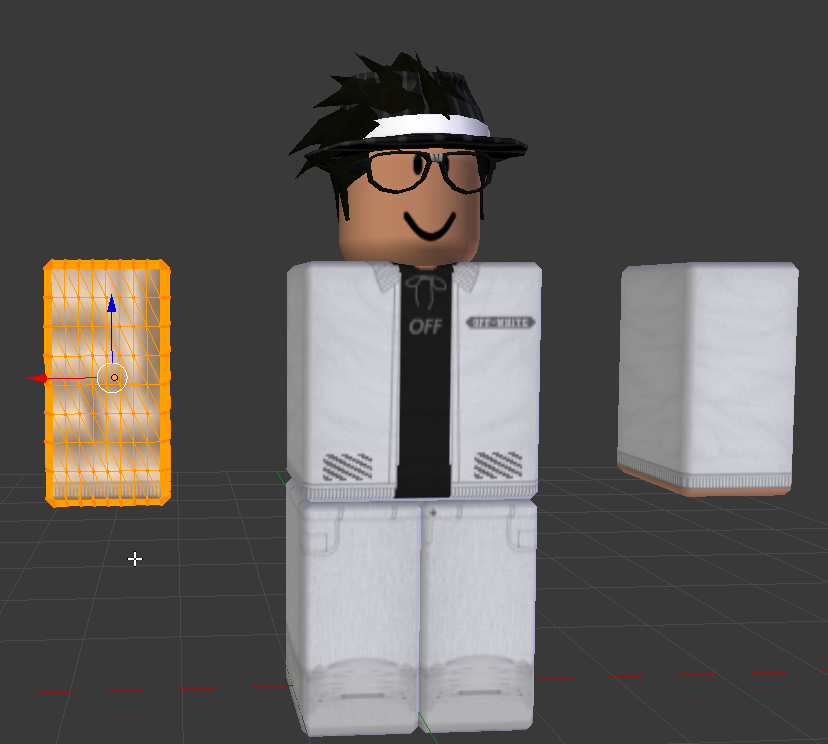
Your character should show up on the screen.
https://i.imgur.com/vlnR1u6.png
Congratulations, you finished the easy part!
OBJECT EDITING AND SHAPING LIMBS
Before you do anything, you should click on this tiny + sign on the side of the screen.
https://i.imgur.com/W1e2lrN.png
This should open up a side menu, which what I call the Workspace Editor (i literally dont know at this point)
https://i.imgur.com/bOAROWJ.png
Now, the reason why you need the menu open is because your character needs to have a textured view. This is what I mean.
https://i.imgur.com/Igx284O.gif
Click on Textured Solid, and your character should be textured within the Workspace.
https://i.imgur.com/X0vSU7t.png
This is just an aesthetic thing and it helps to see if your character had the correct textures like mine.
Moving on, we need to explore more into the tools that you can use to move and manipulate the objects in the Workspace. These tools are explained below.
https://i.imgur.com/l3p6wBu.png
You do not need to worry about the camera at this current moment. You’re going to bend limbs and such. I’ll show you below.
BENDING LIMBS
Bending limbs is probably the hardest part in this tutorial. All you really need to do is move both arms away from the torso like this. If the compass is no where close to the object you want to move, click Shift + Ctrl + Alt + C and then click Origin to Geometry to recenter the compass.
https://i.imgur.com/TGjm1xY.png
Your compass will look like this.
https://i.imgur.com/ru8xRtS.png
Now. Moving and bending limbs.
Move to both arms away from the torso, like this.
https://i.imgur.com/FTcSBut.png
Extruding back to the regular Blender UI, you should select one of the arms and then go into Edit Mode, where you edit your limbs.
https://i.imgur.com/xUhMrwx.png
Once you go into Edit Mode, you should be seeing this.
https://i.imgur.com/c3yiGkF.png
Now, in order to bend limbs, we must do something called subdividing, which divides the limb into 3-4 different subsections where you can specifically bend the limbs by your preferences. In order to subdivide, you must press W on the limb that you plan to edit, and then click subdivide. You should do this 3 times, so there can be 8 different rows on your arm, like so.
Now. Before we go bending limbs, we need to do a few things. Click on the defined buttons below.
https://i.imgur.com/eK8Qgnz.png
Press A to unselect all of the limb, and then hold ctrl while dragging left click to select the bottom part of the arm with a lasso selection, like so.
https://i.imgur.com/wolWoJf.png
Then, you simply press R and bend the limb. It may take you a few tries, but it should look like something like this.
https://i.imgur.com/dGjvfZi.png
Then, you press A to select all of the limb to move it back to the torso like this.
https://i.imgur.com/MADcent.png
You do the exact same thing on the other limb and your product should look like this.
Yes, I’m perfectly aware that the limbs are odd looking. It’s just how Blender shades the roblox character. When you render it, it should be gone. Here’s what I’m talking about.
https://i.imgur.com/EAdBhmz.png
Alright. You finished the Bending Limbs part. Moving on to the next section.
ENVIRONMENT LIGHTING / SHADING & RENDERING
Now, since you have your character done, you go back into the Essentials Tab, marked below.
this is the picture taken in part 1.
https://i.imgur.com/0BZfp9H.png
Now, the first thing you should do is to go to Shading and change the Alpha from Sky to Transparent, just so we can use the render when we import it into Paint . Net.
https://i.imgur.com/dXtXGEZ.png
Next, click on the Earth Tab, which is where you will control your environment lighting.
https://i.imgur.com/Y7200Ec.png
Now, dependent on your character’s skin color, you should check off specific lighting preferences.
If your character is lighter, you don’t need that much light, as it’ll be too bright to use in renders. You should check off Environment Lighting and Indirect Lighting only. You can also use just Environment Lighting, as Indirect Lighting doesn’t specifically matter.
https://i.imgur.com/SbGWKnC.png
If your character is darker, like mine, you should check off all of the lighting options.
https://i.imgur.com/rDu51sy.png
Lighting is done. Now, how do you render? Well, I’ll show you.
The camera is what you need to direct when you render a character. You should move it in a comfortable spot.
https://i.imgur.com/pH38nL8.png
As you can see, the camera isn’t specifically aiming at my character. So, you need to rotate it. This is where the numberpad goes in. Click 0 on your numberpad to go into the camera view. If you do not have a numberpad, click the following here.
https://i.imgur.com/O2aSJmc.png
Your screen should be something like this.
https://i.imgur.com/am2xtbV.png
To rotate your camera, simply press R twice and drag your mouse around until you see your character, like this.
https://i.imgur.com/DbDXwES.png
If your camera is not aligned perfectly, press R until you see the 2 black arrows as your cursor. Use that to rotate your camera so it can be turned into a good image. You can drag the camera to multiple directions by RIght Clicking the camera box, then dragging the camera box with right click.
My camera box looks like this.
https://i.imgur.com/t1r8vpB.png
So now, from here, click on the Camera tab again in the Essentials tab thingy.
https://i.imgur.com/BT0tiZI.png
And then, click render.
https://i.imgur.com/QH5yB7Y.png
This is what you should see. A checker box like background behind your character. If you don’t have that, make sure that you make your Alpha as transparent.
Congratulations! You’ve rendered your character!
To save your image, go click Image and Save as Image. Save it wherever you want. Remember where you put it, as you’re going to need it in Paint . Net.
IMPORTING INTO PAINT . NET
Open up Paint . Net and simply, just open up the image that you just exported from Blender. Your screen should be looking like this, if I’m not mistaken. (feel free to close out of the white square artboard that paint . net starts up with.)
Make a new file with the dimensions of 1000 x 1000. You will use this for your discord profile image.
Copy using Ctrl + C from the old file and then paste it into the new file. Scale up the image to an appropriate size, like so.
https://i.imgur.com/UW5VEVL.png
Make a new layer, and just work off of it from there.
My final product looks like this.

FINALIZATION AND PRODUCT EXAMPLES
Well, there you go. You rendered and finalized your project. Congratulations.
Here’s a few examples of what you can do with your current knowledge.


I created all of the art above. As you can see, the possibilities are endless.
lmk if you want more tutorials like this. I’ll be making a poll reply down below.